
Scaling the Deployment
The last step in this lab will be the creation of a Service for our Deployment and scale Pods up and down. Finally, our deployment will look like this:
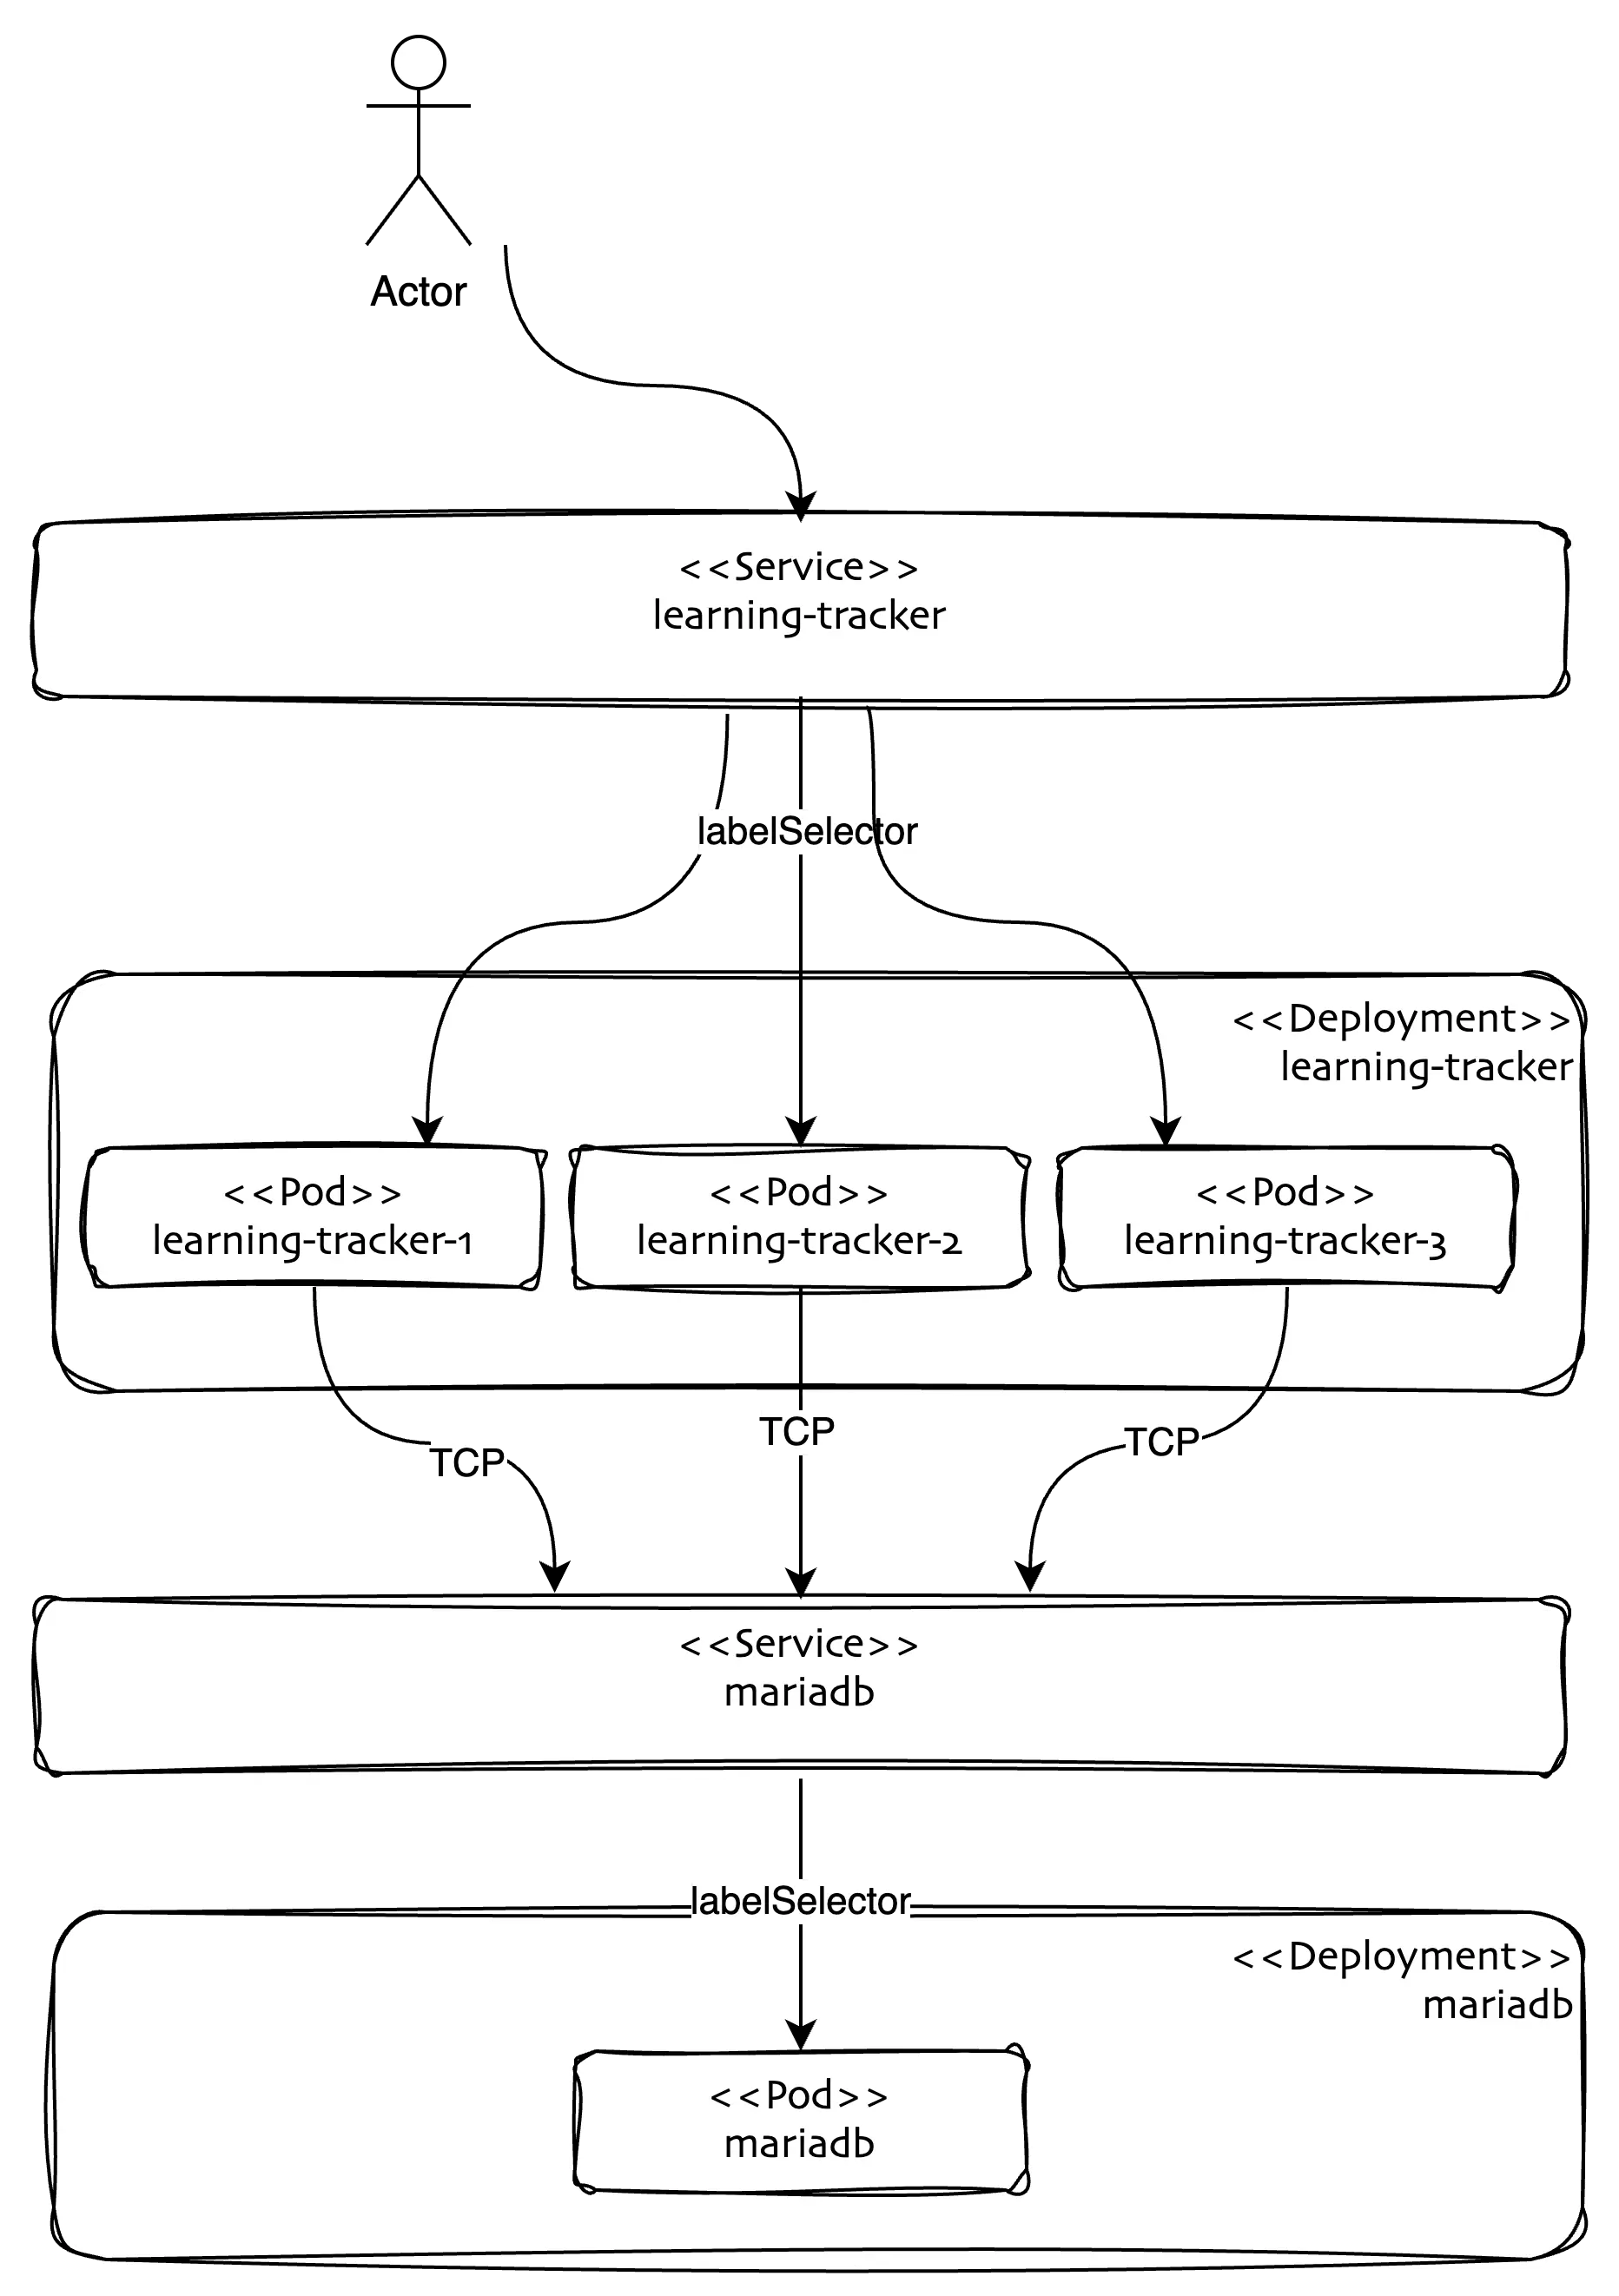
First, please create a manifest for your Deployment using the command:
kubectl expose deployment learning-tracker --type=NodePort --node-port=30080 --target-port=3000 -oyaml --dry-run=client > learning-tracker-service.yamlFurthermore, remove the previously created Pod manifest from the folder, as we'll not need it anymore:
rm learning-tracker-pod.yamlYou can apply multiple manifests in a directory. In the meanwhile, we have four manifests in it to create Deployments for our app and database. To apply all of them, just use the command:
kubectl apply -f .This will apply all manifests in the current folder, you should see that almost all objects remain unchanged and only the Service gets created. You should be able to see the new Service using the command:
kubectl get servicesWhen using minikube, you will need to execute minikube service learning-tracker -n learning-tracker to access the service (at least on MacOS). On Linux-based Kubernetes distributions, you should be able to access your service on the port 30080 (e.g. http://localhost:30080) now. This is a good starting point to add more pods to be able to handle more load when our service gets popular. The minikube output should look similar to this:
$> minikube service learning-tracker -n learning-tracker
❯ minikube service learning-tracker -n learning-tracker
|------------------|------------------|-------------|---------------------------|
|    NAMESPACE     |       NAME       | TARGET PORT |            URL            |
|------------------|------------------|-------------|---------------------------|
| learning-tracker | learning-tracker |       30080 | http://192.168.49.2:30376 |
|------------------|------------------|-------------|---------------------------|
🏃  Starting tunnel for service learning-tracker.
|------------------|------------------|-------------|------------------------|
|    NAMESPACE     |       NAME       | TARGET PORT |          URL           |
|------------------|------------------|-------------|------------------------|
| learning-tracker | learning-tracker |             | http://127.0.0.1:63395 |
|------------------|------------------|-------------|------------------------|
🎉  Opening service learning-tracker/learning-tracker in default browser...
❗  Because you are using a Docker driver on darwin, the terminal needs to be open to run it.
✋  Stopping tunnel for service learning-tracker.
Furthermore, the Service should be reachable via the external IP shown in Minikube with the port 30080 (e.g. http://localhost:30080). This is a good starting point to add more Pods to be able to handle more load when our app gets popular.
When inspecting all our services, we should get the following output:
NAME               TYPE        CLUSTER-IP      EXTERNAL-IP   PORT(S)           AGE
learning-tracker   NodePort    10.97.178.95    <none>        30080:30376/TCP   9m16s
mariadb            ClusterIP   10.105.12.159   <none>        3306/TCP          13m
As we used a Deployment to deploy our application, all mechanisms to scale it are already there. If we want to scale in a quick and dirty way imperatively, we can simply use the command:
kubectl scale deployment learning-tracker --replicas=3After this, you should see three learning-tracker Pods when using the command kubectl get pods. If you re-apply the original manifest without changing replicas, the count will revert to one. You can change this in the manifest by specifying the replica count there as follows:
[...]
spec:
  replicas: 3
[...]
When applying the manifest again, the replica count should go up to three again. If you access your Service and take a look at the logs of the three Pods, you'll see that the requests are distributed across them (if you're using minikube, you still might see requests only on one pod).
You created a simple Deployment using two Pods, connected them and made your app available via a NodePort